Saturday, October 20, 2012

How To Make a Fatty Piston

In an earlier article, we talked about fatties - bacon wrapped smoked meat heaven! Friend and fellow competitor, Arthur Aguirre of Major League Grilling is pretty much a master of the Fatty. Arthur regularly contributes to Scott Thomas' highly popular website GrillinFools.com. I decided to give one of Arthur's recipes, the famous Blueberry Muffin Fatty, a try this weekend.

In Arthur's recipe, he makes use of a very unique tool called a "Fatty Piston". The Fatty Piston is designed to compress the ingredients used as stuffing for a fatty into a log. The log is then frozen in order to maintain it's shape. When you are ready to construct the Fatty, you simply remove the log of stuffing from the freezer, place it on the flattened square of sausage and roll it up - voilĂ ! The Fatty Piston is incredibly easy to construct and best of all, you can get everything you need at your local hardware store for less that $10. Let's get started!

Fatty Piston Materials
The fatty piston is entirely constructed with PVC schedule 40 pipe and pressure fittings that are commonly used in irrigation, sprinkler systems, swimming pools and cold water supply lines. 

Here is what you will need (pictured at right):

2" PVC Pipe (cut to 10" length)
1/2" PVC Pipe (cut to 12" length)
1 1/4" PVC Cap
1 1/4" to 1/2" PVC Adapter
1" PVC Cap
1" to 1/2" PVC Adapter
2" Knock Out Plug (quantity of 2)

The first step is to cut the PVC pipe to the specified lengths above. Both Lowes and Home Depot have the 2" and the 1/2" PVC pipes pre-cut to 2 foot lengths. If you don't have a hacksaw, they will cut the pipe to length for you at no charge. I bought 2 foot of 2" PVC and cut it into two 10" tubes so that I could make and freeze two logs at a time. These 10" tubes are the cylinders that you will fill with the ingredients that will be compressed into the log and then frozen. Next cut the 1/2" pipe in half and saved the other half in case you want to make another piston. The 1/2" pipe is actually the drive shaft for piston you will use to compress the stuffing ingredients into the cylinder. The next steps involve assembling the piston.


PVC Caps and Adapters
Assembled Handle & Head
Fully Assembled Piston


First we will assemble the piston handle and the piston head. For the piston handle, insert the 1" to 1/2" PVC Adapter into the 1" PVC Cap. Then for the piston head, insert the 1 1/4" to 1/2" PVC Adapter into the 1 1/4" PVC Cap. The final step is to attach the assembled handle and head to the 12 inch section of 1/2" inch PVC (the drive shaft) thus creating the Piston. All of the parts fit quite snugly so there is no need to use PVC cement. Assemble as shown above.

Insert Knock Out
Pack Ingredients
To use the fatty piston, simply insert one of the knock out plugs into the bottom of the 2" PVC cylinder. Stand the cylinder upright and begin adding your stuffing ingredients. Each time you add an inch or two of ingredients, use the piston to pack them tight. You will want to pack your ingredients until they are about 1 1/2 inches from the top of the cylinder. Then you simply cap the top of the cylinder with the other knock out plug and place the entire cylinder upright in your freezer.

When you are ready to construct the Fatty, remove the knock out plugs from the top and bottom of the cylinder (I use a butter knife to pry off the knock outs). Then use the piston to push the log of ingredients out of the cylinder.

There you have it! A very simple tool that you can build at home and use to stuff your fatty with just about anything. And today for me, that stuffing will be Blueberry Muffins and Mrs. Buttersworth Syrup!

Monday, October 8, 2012

Making Your Own BBQ Sauce

A couple months back, we had a post on making your own BBQ rubs. Probably the most requested topic since that post has been "How to Make Your Own BBQ Sauce". Today, that's just what we are going to do. 

When most people think about their favorite BBQ sauce, what comes to mind is a thick sauce red to brown in color that is sweet and tangy with just touch of heat. This type of sauce is typically referred to as Kansas City style. Most of the BBQ sauces you find in your local supermarket are Kansas City style sauces. If you take a look at the ingredients you will find almost all of them have a tomato component (ketchup, tomato sauce, tomato paste, etc), a sweet component (sugar, honey, molasses, etc), a tangy component (vinegar, lemon juice, etc), some sort of liquid flavoring (Worcestershire, liquid smoke, soy sauce, etc,) and various spices (bbq seasoning, garlic, onion, and peppers such as black, white, crushed red, etc). In a nutshell, they are tomato-based, sweet and tangy and vary in degree of spiciness. Since this the most popular style of BBQ sauce, this is kind of sauce we will focus on making today. Let's get started!

Just like in making rubs, I like to start every BBQ sauce recipe with a trinity consisting of a ketchup, sugar and vinegar (tomato, sweet and tangy). Then I make a list of the flavors and spices that will round out the recipe.

For this recipe, we are going to start by blending the sweet, tangy and spice components and then develop that into a sauce. I like to use fresh ingredients where possible and included them as options in the ingredient list below. In a large sauce pan, add the following:
  • 1 1/2 cups firmly packed brown sugar
  • 1/2 cup clover honey or honey blend
  • 1 cup apple cider vinegar
  • 1/4 cup of water (can omit this if you like a thicker sauce)
  • 2 tablespoons lemon juice concentrate or juice from 2 medium size lemons
  • 1 tablespoon of granulated onion or 1 small white onion finely minced
  • 1 teaspoon of granulated garlic or 1 tablespoon of minced garlic
  • 2 tablespoons of barbeque spice (McCormick or Weber are best)
  • 1 teaspoon ground black pepper
Bring these ingredients to boil and then reduce the heat and simmer for 15-20 minutes. You want to stir the entire time until the sugars have melted and then stir frequently enough to keep the mixture from burning as it comes to a boil. If it gets too thick and/or starts to burn the bottom of your pan add some more water.

Next we will add the tomato base and other flavoring components. Stir in the following:
  • 1 24 oz bottle of ketchup
  • 2 tablespoons of liquid smoke
  • 1 tablespoon of Worcestershire sauce
Simmer this sauce for another hour or so.

Now is when it really get's fun and where you can get creative an tailor the sauce to your own palate. NOTE: You will want to write down everything you do to tweak your sauce - trust me! I have created some masterpieces that I have not been able to duplicate because I skipped this crucial step!

Give your sauce a taste test. Is it too thin or too thick? Is is too sweet or not sweet enough? Is it too tangy or not tangy enough? Does it need more heat?  Depending on your palate, you can now adjust the sauce and create your own masterpiece. Below are some suggestions.

If your sauce is not thick enough, add a small (6 oz) can of tomato paste. This will thicken the sauce without drastically changing the flavor. Add molasses and tomato paste to thicken and sweeten. Add vinegar and tomato paste to thicken and make it tangier. Add 2 cans of tomato paste, and equal parts of vinegar and molasses to thicken and make it sweeter and tangier. Start with 1/4 cup of molasses and/or vinegar depending on what you are trying to adjust. And remember each time you add something, STIR BEFORE TASTING AGAIN AND WRITE IT DOWN! Finally, you can also simmer the sauce a couple hours longer to reduce the liquid if it is still not thick enough after making adjustments.

If your sauce is too thick, add some water to thin it without drastically changing the flavor. Add apple juice to thin and sweeten. Add vinegar thin and to increase the tanginess. Add equal parts of vinegar and apple juice to thin and both sweeten and make tangy. Start with 1/4 cup depending on what needs to be adjusted. Each time you add something, REMEMBER TO STIR BEFORE TASTING AGAIN AND WRITE IT DOWN!

Finally, it is time to adjust the heat. I intentionally left a couple ingredients out of the initial batch which is where I usually add my spicy components. The reason I left them out is that it is very difficult to tame the heat in a BBQ sauce if you make it too hot from the get go and I have a high tolerance for heat so I am the wrong person to ask if something is spicy or not.

If you really like it hot, then add just a teaspoon of crushed red pepper in the very first step and we can adjust and make hotter in this last step. I recommend using a hot sauce like Frank's red hot or Tabasco sauce to kick up the heat. If you are a maniac for pain like me, use Dave's Insanity or Ghost Chili sauce to really kick up the heat! I suggest thoroughly stirring the hot sauce in a teaspoon at time testing after each dose until you get the heat where you want it. This is really the best way to ensure the heat ends up just right for you! OH - AND REMEMBER TO WRITE IT DOWN!

Last but not least, there are a number of other ingredients you can incorporate into the very first step to add sweetness, tanginess, flavors and spice. For sweetness, I have used Karo syrup dark or light, white sugar, turbinado sugar, agave nectar and even maple syrup. For tanginess, I have used different kinds of vinegars (balsamic, tarragon, rice, red wine, white wine), wines, beer and citrus juices. For flavors you can add bourbon, broths (chicken, beef), chocolate sauce, coffee, mustard, pepper jellies and soda pop. And for spices, I like using allspice, cinnamon, chili seasonings, chipotle chili powder, dehydrated peppers and mustard powder to name a few.

The recipe I have given you is a great starting point for you to create a wonderful BBQ sauce ... as long as you remember to WRITE DOWN YOUR CHANGES :) Please enjoy and please share your recipes! I am looking forward to hearing about your creations!

Saturday, September 15, 2012

Smoking a Brisket

Finished Brisket from Today's Cook
Brisket is probably the most requested recipe that I have been asked to post. I am going to be making a smoked brisket chili this weekend as practice for the 2012 Wildwood Bash at the end of the month. I will be cooking the brisket using the same method as I would for a competition, the only difference is that I will be cooking just the flat as opposed to the entire brisket and I will be using a commercial rub. Let's get started.

I picked up a 5lb USDA Choice Brisket Flat at Costco. The quality is a notch above what you can typically find at Sam's Club and the cost is about 1/2 of what you will pay at your local grocery store. There are a couple of things to consider to make sure you are getting the best possible cut of meat.

What You Will Need
First, I look for a brisket with a uniform thickness so that it will cook evenly. If the brisket has a significant taper, the thinner portion will get to temperature well ahead of the thicker portion and you potentially will ruin a great cut of meat. Secondly, look for a brisket that has a minimal amount of fat. I trim all the fat from the top and only leave about 1/8 inch of fat on the bottom (I will discuss why in a bit). And Finally, the brisket should be flexible, not firm when you give it a shake. The more flexible, the more tender it will be when it's fully cooked.

The real trick to cooking a brisket is to keep in the moisture during the cook. Some people will tell you that you need to leave all the fat on the bottom side of the brisket and that you need to mop it or spray the brisket to keep it from drying out. I will let you in on a little secret. There is a much better way - injection!

For this cook I will be using an injection and a rub commonly used on the competition circuit, both of which are available from online retailers. The injection is the key to keeping the moisture in the meat throughout the cook. I use a Brisket Injection developed by David Bouska of Butcher BBQ. David's product unlike others has moisture holding capabilities to keep the brisket moist even after slicing or reheating. The only drippings I get during the cook are from the rendered fat on the bottom on the brisket. The injection locks the remaining juices inside and keeps the brisket moist and tender. For the seasoning, I am using a competition rub called "Wow Up Your Cow" from The Slabs BBQ Team. I have heard nothing but good things about this rub from fellow competitor's so were giving it a try. I bought the rub online at the Kansas City BBQ Store.

Bottom Trimmed
Top Trimmed
Untrimmed Brisket
Let's get started prepping the brisket. You want to trim all of the visible fat and silver skin off of the top of the brisket. Because we are injecting, it's OK to trim a majority of fat from the bottom side of the brisket. Try to leave at least 1/8 inch of fat on the bottom side. Trimming the fat allows the rub to penetrate the meat and helps form a flavorful bark on the outside surface.

Adjustable Injector
The next step is to inject the brisket. I used to use a standard Cajun injector that you can find in most grocery stores. A couple weeks ago I picked up an adjustable dose automatic livestock injector from a veterinary supply store (pictured at left). This injector is awesome. It has a 12.5cc barrel and a stainless steel luer lock nut that allows you to screw in a standard needle from a Cajun injector. When you squeeze the trigger, the injection liquid is drawn through the tube until the barrel is full. Now each time you release the trigger after injecting, the liquid is automatically drawn through the tube refilling the barrel for the next shot. It only takes me about 3 minutes now to inject a whole brisket. And clean up is a breeze. You just drop the tube in hot water and cycle it through until the barrel and tube are clean. Now, to inject the brisket, try to imagine the brisket is a checkerboard. You want to inject each imaginary square keeping the needle in the center of the meat. You will likely have some liquid ooze out during the process. Rub the liquid on the surface of the brisket. This will help the rub stick. Now it's time to apply the rub.

Brisket On!
In competition, I usually layer my seasonings. The first seasoning I use is equal parts of salt, black pepper and paprika. I let the seasoned meat sit in the cooler for an hour or so to draw in those flavors. Then, just before I put the brisket on the smoker, I hit it again with a rub. If you follow this method, you will develop a nice bark and deep smoke ring. Since this brisket is going into a chili, I am not as concerned with getting all those complex flavors and a deep smoke ring. I want the brisket to take in the flavors in the chili spices. So for this cook, I am just going with the "Wow Up Your Cow" rub. All you need to do is to shake the rub on applying a nice even coat on both sides of the brisket. Now it's time to get smokin'.

Set up your Weber for 2-zone indirect cooking. The target smoker temp for the cook is 225°F.  I am using both the cherry and the oak/pecan combination mojobricks for this cook. Cherry is my favorite wood for brisket. I am using the oak/pecan combo to impart some flavors that I think will go well with my chili seasonings. Once the smoker is up to temp, on with the brisket!

We are going to wrap the brisket in aluminum foil when it gets to an internal temp of 160°F.  For a 5lb brisket cooking at 225°F, we should get there in around 4 hours. After 4 hours, check the internal temp with an instant read thermometer. If it's still below temp, check back every hour. It's OK if we go over 160°F.  Brisket strangely enough hits a wall at around 160 - 170°F. It could take a couple of hours to push through that wall. The reason you wrap the brisket is one, to help it push through the wall and two, to help tenderize the meat. The foil locks in the heat and keeps the juices from any fat that still hasn't rendered locked inside as well. You want to double-wrap it very tightly with heavy duty aluminum foil.

Off at 195°F
After you have wrapped the brisket, the new target internal temp is 195°F. Note that a brisket is actually fully cooked when it hits an internal temp of 200°F. What I have found is that the brisket continues to cook after it is removed from the smoker and the temp will rise at least another 5 degrees (see picture at right). I took the brisket off at 195°F and within 5 minutes the temp hit 199°F. For a 5lb brisket, it should take 2-3 hours to hit the new target temp. After 2 hours check the temperature. You want to check every half hour because we don't want to overcook the brisket. If it ends up going over 195°F, don't worry. Take it off the cooker and open the foil to expose the meat. That will slow down the cooking process and keep it from going to far over 200°F.
1/2 cubes for Chili

After you hit temp, remove the brisket and rest it for about 30 minutes before slicing. Resting will allow the brisket to firm up and soak in some of the moisture that has rendered out. You want to slice the brisket against the grain at a width of a pencil or about 3/8 inch. Since I am making chili, I sliced at a width of 1/2 inch in order to make 1/2 inch cubes (picture at right).

So there you have it - a proven method for cooking a tender juicy brisket that will have your friends and family wanting more. Please give it a try and let me know how it turns out!

Sunday, September 2, 2012

Bacon Wrapped Fatty

Whenever I tell someone I can't wait to smoke a fatty I usually get a strange look. No it's not a cigar or something illegal, it's BBQ! So what is a fatty? The Online BBQ Dictionary defines a "Fatty" as: "A tasty treat that starts with sausage, includes a stuffing, and once rolled upped is wrapped with bacon.  This whole package is then smoked until the bacon is crisp." For me, it's Bacon Wrapped Smoked Meat Heaven!

A fatty is really easy to make. All you need is a 1 lb. package of bacon (about 14-15 slices), a 1 lb. roll of sausage, BBQ rub and a stuffing. What you stuff your fatty with is really up to you. The possibilities are endless. You can use breakfast ingredients like eggs, hash, and cheese, or you can use pizza ingredients like mozzarella, pepperoni, black olives and mushrooms or even mexican ingredients like chorizo, hot peppers and crumbling cheese. Today, I am going to show you how to make a spicy bacon cheeseburger fatty. Let's get started!

The first thing we are going to do is make a bacon weave (pictured at left). If you do a google search on "bacon weaving", you will find all kinds of resources from videos to step-by-step pictures on how to weave bacon. I started by laying 7 pieces of bacon in a horizontal row and weaved 8 pieces vertically to end up with 7 x 8 bacon weave.

Now it's time to roll the sausage (pictured at the right). For this step, you place the sausage in a one gallon zip lock bag and roll it out with a rolling pin. You want to leave the bag unzipped to allow air to escape while you are rolling. Start by dropping the roll of sausage in the bottom of the bag an then start pressing it flat by hand. When you get it good and flat, you can use a rolling pin to finish. You want to make sure the sausage is uniform thickness and that it is slightly smaller than your bacon weave. Now comes the fun part - stuffing!

I had some leftover smoked cheeseburgers which are my inspiration for today's fatty. We are going to make a spicy stuffing with chopped/crumbled cheeseburgers, bacon pieces, jalapeno peppers, pepper jack cheese and smoky chipotle pepper rub (or chipotle chili powder will work fine). 

Place the pork slab on a sheet of parchment paper. The first step is to lightly dust the entire slab with chipotle pepper rub. Now, starting at the bottom, we want to layer the remaining ingredients on about 2/3 of the slab (see left). You want to make sure to leave some room at the top because when we start rolling, the ingredients will get pushed to the uncovered portion of the slab. The first layer is the pepper jack cheese. Then evenly layer the chopped/crumbled leftover cheeseburgers. Next comes the bacon pieces and finally the jalapeno peppers. Now were ready to roll!

Starting at the bottom, carefully start rolling the slab towards the top by lifting the parchment paper and using it to help you roll. Peel back the parchment paper as you are rolling and pressing the slab into a log. As you get near the top of the slab, there should be just enough uncovered pork left to overlap with the roll and seal in the stuffing. You should end up with a log with all of the ingredients inside. Use you hands to shape the log and pinch in the ends.

The final step is to wrap the log in the bacon weave (pictured at right). Start by placing the log on the weave about one inch from the bottom. Then, using the parchment paper to help, roll from the bottom towards the top pulling back the parchment paper as you roll. With the 7 x 8 weave, there should be enough bacon left to overlap the roll. Make sure the seem is on the bottom of the roll. I finished with a very light dusting of chipotle pepper rub. Now it's time to smoke your fatty!

Set up your Weber for indirect cooking. The target smoker temp for the cook is 225°F.  I am using hickory mojobricks for this cook. I prefer hickory flavor with bacon and with hamburger and it also imparts a nice mahogany color to the finished fatty. The target internal temp for the fatty is 165°F. Once the fatty gets to temp, take it off the smoker, tent it with foil and rest it for 15 minutes.

Now it's time to serve! You have several serving options with a fatty. You can slice it and serve it plain or with your favorite BBQ sauce. You serve it open face over Texas toast or bread with or without sauce. You can serve it as a regular sandwich or in our case, we are going to slice it and serve it on a bun like a hamburger because after all - that's what we stuffed it with!

Now you know what a fatty is - Bacon Wrapped Smoked Meat Heaven! So the next time you hear me say, I can't wait to smoke a fatty, you will know exactly what I mean! I hope you will give this a try. It is simple and it is only limited by your imagination. I can't wait to hear about your creations!


Thursday, August 23, 2012

Beer Can Chicken on the Smoker

A beer can chicken is probably one of the coolest things you can cook on your smoker. Pull a chicken sitting upright on a throne out of your smoker and it will definitely turn some heads. And believe me, your friends will be talking about it for days, especially once they get a taste. This cooking method produces a gorgeous looking succulent and juicy bird infused with flavor. Think about it - you are steaming the chicken from the inside out while at the same time roasting it and crisping the skin from the outside in. And, all the while you are infusing spices and flavors throughout the bird. I guarantee once you try it, you will want to cook your chicken like this from now on! Let's get started.

The first step is to select a throne for your bird. There 3 options shown to the right. Option 1 is a can of your favorite beer. Option 2 is a Chickencan Rack (lower left) and Option 3 is a Poultry Roasting Rack (back center).

The beer can is the simplest and most cost effective option. All you need to do is drain 1/2 the beer and use a can opener "church key" to make several holes (vents) in the top of the can. The challenge is you need to use the birds legs and the the beer can as a tripod to balance the chicken on the grill. Not so easy to do on a grill grate. It is a little easier to balance if you put the chicken on a baking pan, and then place it pan and all on the cooker.

The second option is the Chickencan Rack. The advantage of using this rack is that you gain stability via the metal legs. You still prepare the beer can as previously described and simply insert it into the built-in can holder. The main drawback of this rack is that it is slightly larger in circumference and you have to cram it into the body cavity (much politer term than poop shoot) and it may require some trimming to make it fit. I still recommend using a baking pan for stability and for ease of removing the chicken after cooking.

The final option is the poultry roasting rack which is my preferred method. The roasting rack has several advantages. First, you are not limited to canned beer. I prefer microbrews which generally are only bottled. This rack has a built in cup where you simply pour the beer and add spices. Secondly, the throne (infuser) is trim and tapered and therefore much easier to mount the bird. And finally, it has a built in pan that adds stability and that can be used to add more flavoring agents (beer, wine, broths, spices, etc).  So now that you have selected your type of rack, let's get started.

Set up your smoker for 2-zone indirect cooking. Our target temperature for the cook will be 250°F. I prefer to smoke chicken with fruit woods. They are milder and impart a sweetness to the meat. I generally use cherry wood or a 50/50 combination of cherry and apple. You will need two small chunks for the cook. We will add the wood to the smoker when we put on the chicken. For now, go ahead and get the coals started and we will move on to the prep.

You want to use a fresh chicken at least 4 lbs and no more than 5 lbs (any bigger and you might not be able to close the lid on the Weber). To prep the bird, remove the package of giblets and pat the chicken dry inside and out with a paper towel. Trim away the excess skin around the neck with kitchen scissors or poultry shears. You may also need to trim around the cavity to enlarge the opening so that the can or infuser will fit.

The next step is to apply the rub. I like to apply a light coat of oil (used chipotle olive oil) on the outside of the chicken. The oil helps the rub to adhere to the skin and it also helps to crisp the skin during the cook. Generously apply the rub inside and outside of the chicken. Now it's time to prepare the beer can or infuser.

If you are using a beer can, empty half of the liquid and vent the can as previously described. If you are using the poultry roasting rack, fill the built in infuser 3/4 full with beer. Next, add 1 to 2 tablespoons of chicken rub to the beer a little bit at a time (prevents foaming). If you are using a beer can, gently swirl the can each time you add some rub. If you are using the poultry rack, gently stir with a spoon each time you add some rub. Once you've finished adding the rub, the final step is to mount the bird on it's throne.

If you are using a beer can only, place the can in the center of a baking pan and ease the chicken (legs down) onto the beer can creating a tripod with the can and the legs. If you are using the Chickencan Rack, place the beer can in the built in holder, place the rack on a baking pan, and then ease the chicken onto the rack. Finally if you are using the poultry roasting rack (pictured at right), mount the chicken on the infuser and insert the infuser cap through the neck hole to lock the chicken to the infuser. Another advantage of the roasting rack is that you can add additional liquid and seasonings to the built in pan. For this cook, I added about 1/4 inch of beer, some more rub and some freshly minced garlic and onion. Yum! Now it's time to start the cook.

Put the chicken on the weber in the cooking zone with the legs and breast facing the heat zone. This positions the legs, which take longer to cook, closest to the heat source. As a final prep, pull the wings backwards and using toothpicks, pin them to the sides of the chicken. This prevents the wing tips from burning and it also exposes the sides of the breasts for optimal cooking. Next add the smoking wood and put the lid back on the cooker. Now it's time to cook!!!

Just kick back and let the smoker do it's thing. As long as you are able to hold the temperature near 250°, you won't need to check the chicken until 2 hours into the cook. At the 2 hour mark, you will want to check the meat temperature. Our goal temperature is between 160° to 165°. Insert an instant read thermometer into the thickest part of the breast to take the reading. If your not quite there at the 2 hour mark, quickly replace the lid and re-check every 15 minutes.

As soon as the temperature is within the target zone, remove the chicken from the weber and rest it for 15 minutes. The chicken and the beer can and/or rack and the liquids will be very hot even after 15 minutes, so you will need to exercise caution when removing the chicken. I recommend using a good pair of insulated food gloves to prevent from burning yourself. Also, if you used a beer can, the chicken might be stuck to the can and you may need work the can a bit to get it to separate from the meat. Use caution here because the liquids are extremely hot.

Now it's time to serve! You can slice it or pull it and serve it on a bun. If you used the poultry roasting rack, you can spoon some of the liquids from the pan over the sliced or pulled meat. The leftover's are fantastic in soups or salads or even in a BBQ Parfait!

So there you have it! If you decide to give this a try you won't be disappointed and you just may become a backyard legend with your friends and family - enjoy!


Thursday, August 16, 2012

Making Your Own BBQ Rub

There are a lot of quality BBQ rubs available in the market from what you can find on the shelves of your local grocery store to competition rubs available from on-line retailers. The upside of using a commercially available rub is that the trial and error necessary to develop the recipe blend has already been done for you. The downsides is that you end up paying a significant premium over actual ingredient cost for that recipe. With a little basic knowledge, you can develop a competition quality BBQ rub at a fraction of the retail cost.

If you take a close look at the label, you will see that most of the commercially available BBQ rubs use common cooking ingredients. Almost every blend you can buy lists paprika, pepper, salt, sugar and other spices as the ingredients. The concept that I am sharing today is to start with a basic rub blend that you can fine tune to create a competition quality rub that not only compliments the type of meat you are cooking, but also caters to your own individual taste preference. Using this approach, you can control and tune the sweetness, the heat and flavors to fit your individual palette. Let's get started!

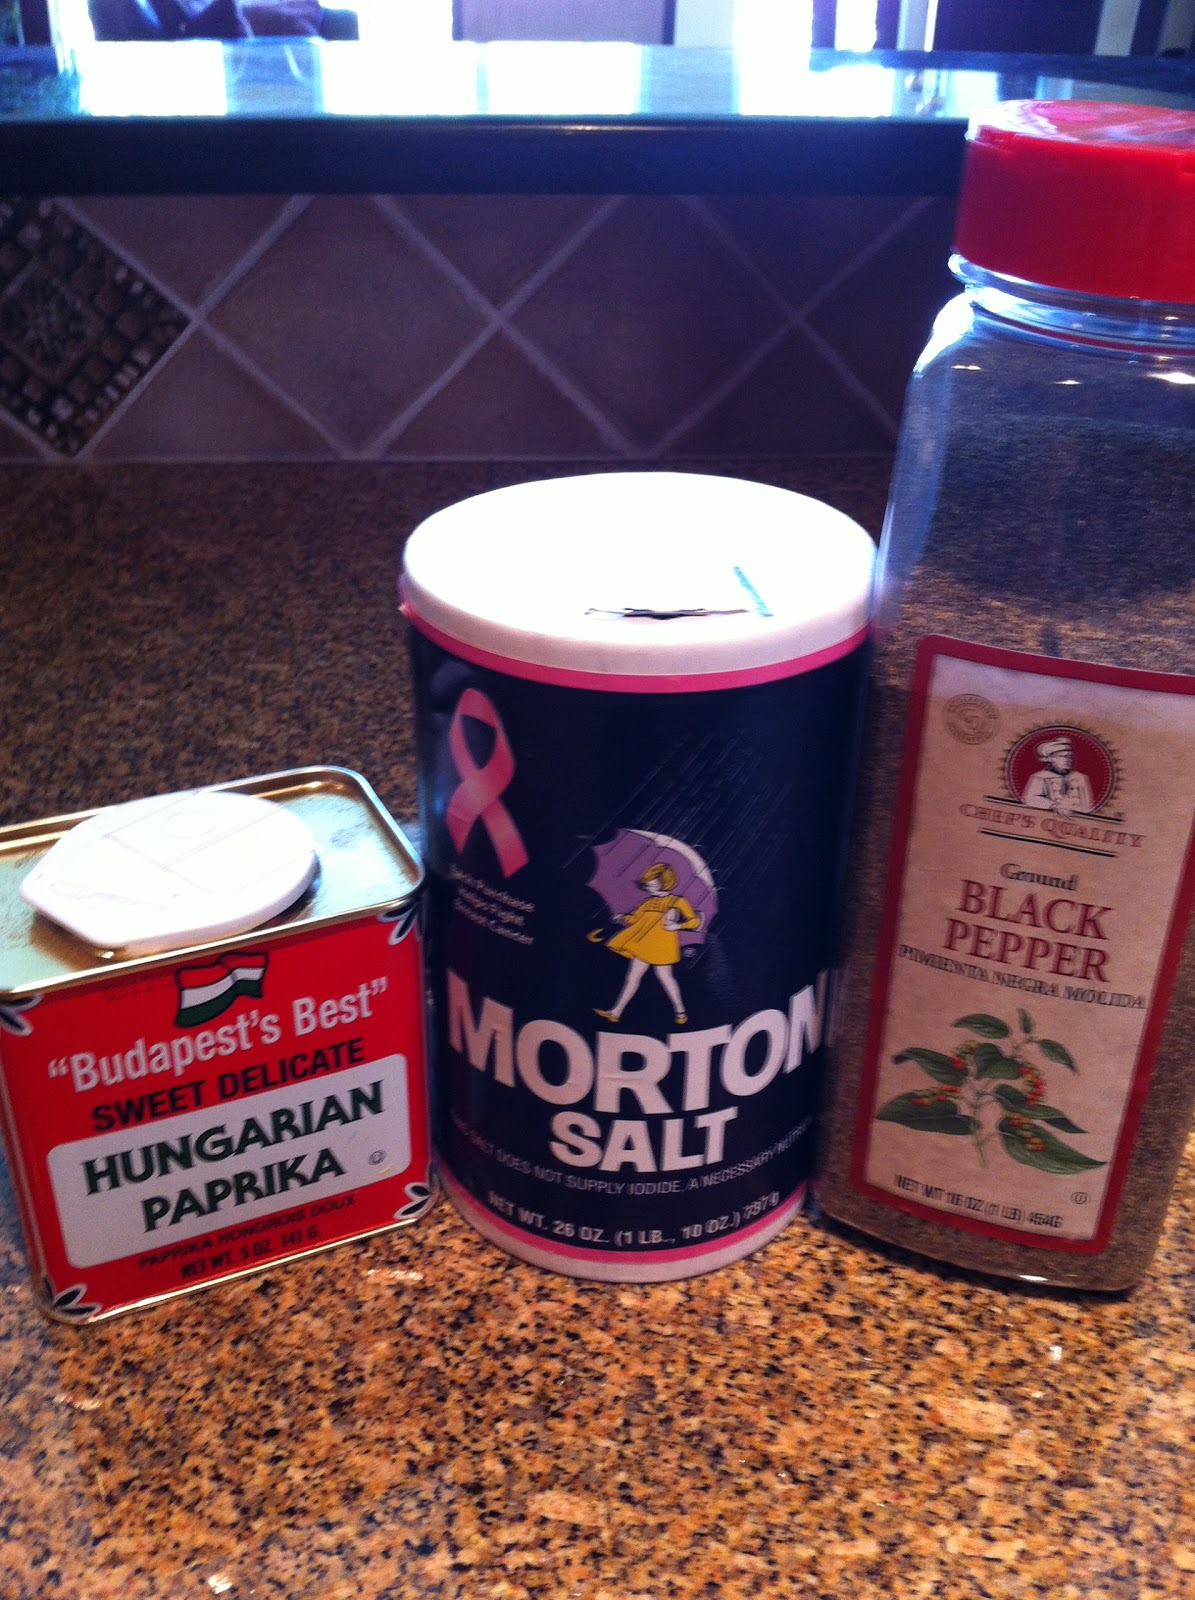
A lot of cooking styles start out with a flavor base of three ingredients. In French cuisine, it's called a mirepoix (carrots, celery and onion). Similar ingredients are known as soffritto in Italian cooking, sofrito in Mexican and the "holy trinity' Creole cooking. The Holy Trinity for BBQ and how I start out every rub I've ever made is with Paprika, Pepper and Salt. In BBQ, like in everyday cooking, the Paprika is used mostly for color. Salt and Pepper simply enhance and accentuate the flavor of the meat.

Here is the Base BBQ Rub blend that I use:

Base BBQ Rub (yield 1 cup)
1/3 Cup Sweet Hungarian Paprika
1/3 Cup Morton Salt (non-iodized)
1/3 Cup Ground Black Pepper

So now we have the foundation and all we have to do is build upon it to develop a flavor that complements the meat you are cooking and suits your individual tastes.

As you recall, there are five common ingredients on the label for most rubs. These ingredients really fall into four main categories: salts, peppers, sugars and spices (aromatics). In the Base BBQ Rub we have used salts (table salt) and peppers (paprika and ground pepper). The only 2 categories remaining that need to be incorporated into the rub are sugars and spices. You have a lot of options for sugars and spices and the meat you are cooking will dictate your choices. Let's start with beef.

For beef, I generally avoid sugar for a couple of reasons. First, I like to use the same rub to season beef whether I am grilling over direct heat or barbecuing with indirect heat. Sugar will blacken and even burn under direct heat which detracts from both the taste and appearance of the finished product. And secondly, I prefer savory to sweet when it comes enhancing and bringing out the flavors in a fine cut of beef. I also like big bold flavors and a bit of heat. Here is my standard recipe for a beef rub.

Beef Rub (yield 1/2 cup)
4 Tablespoons Base BBQ rub
2 Tablespoons Montreal Steak Seasoning
1 Tablespoon Chili Seasoning
1 Teaspoon Garlic Powder
1 Teaspoon Onion Powder
1/4 Teaspoon Cayenne Pepper

Salt and Pepper are probably the best flavor enhancers for beef. Montreal Steak seasoning takes the Basic BBQ Rub to the next level with flavors you can actually see. Chili seasoning (I like Carrol Shelby and Chili Man) introduces a subtle heat and blends in savory spices like cumin and oregano which also go well with beef. Garlic and Onion go great with beef and are in just about every rub, seasoning or marinade made for it. And last but not least, a little cayenne ... just enough to make you take notice!

When grilling beef (steaks or burgers), you just want to sprinkle the rub on and then put it back in the fridge for a couple of hours to give the spices time to penetrate the meat. When your smoking a brisket, beef ribs or a rib roast, first rub the meat with a light coating of oil and then apply the rub very very generously. I generally apply the rub and then throw it right on the smoker. This blend of peppers, salt and spices will result in a tasty crust and help to develop a deep burgandy smoke ring. Wow! I am getting hungry! Now let's look at pork.

Pork is where we begin to incorporate sugars into the Base BBQ Rub. Here is my favorite Pork Rub recipe.

Pork Rub (yield 1 cup)
1/2 Cup Light Brown Sugar (firmly packed)
4 Tablespoons Base BBQ Rub
1 Tablespoon Chili Seasoning (Chilli Man's Hot)
1 Tablespoon Dry Mustard (Coleman's)
1 Tablespoon Seasoned Salt (Lawry's)
1 Tablespoon Celery Salt
1 Tablespoon Onion Salt
 
For pork, you are trying to get a good balance of heat and sweet with neither one overpowering the other. You also want to try to equally balance the amount of sugars and salt in your recipe. This recipe is fantastic for ribs, pulled pork, pork loin and pork steaks. Because of the sugar content, you want to BBQ pork using indirect heat. One note on pork steaks. I like to direct grill them over high heat for a  minute or so on each side before smoking. This is enough time to get a nice sear and grill marks without causing any significant blackening or burning of the sugar. This is a hard recipe to beat!

Finally, let's take a look at how to tweak the Basic BBQ Rub for chicken. Chicken was my nemesis for years in competition BBQ. It took me a while to develop a rub that would appeal to the masses. With chicken, you want lean towards sweet and savory as the dominant flavor profile. Here is the blend that I use for chicken.

Chicken Rub (yield 1+ cup)
1/2 Cup Cane Sugar
4 Tablespoons Base BBQ Rub
2 Tablespoons Poultry Seasoning
1 Tablespoon Lemon Pepper Seasoning
1 Tablespoon Mrs. Dash Original
1 Tablespoon Garlic Salt
1 Tablespoon Onion Salt
1/2 Teaspoon Cayenne (optional for those who like some heat)

So there you have it! What I've given you today is a starting point with the Base BBQ Rub. We've really only scratched the surface of what is possible. With a little ingenuity and some trial and error you can create quality rubs at a fraction of the cost of retail and best of all you can tailor the rub to your individual palette. Here are just a few examples of other ingredients you can incorporate into your rubs.

Sugars - Dark Brown Sugar, Maple Sugar, Turbinado Sugar (sugar in the raw)
Salts - Kosher Salt, Sea Salt
Peppers - Chili Powder (Chipotle, Jalapeno, New Mexico), Crushed Red Pepper, White Pepper
Spices - Basil, Celery Seed, Cinnamon, Cumin, Ginger, MSG, Oregano, Rosemary, Sage, Thyme

Want more heat, more sweet, more savory - tweak the recipes I have given you and make them your own!

Wednesday, August 8, 2012

The BBQ Parfait

Pulled pork is probably our favorite thing to BBQ. When we smoke a couple butts, we typically will have quite a bit left over.  Even though we make pretty tasty pulled pork, eating sandwiches for leftovers can get monotonous after a few days. So how do you spice it up and keep it interesting? Answer: The BBQ Parfait!

The concept for the BBQ Parfait has been around for quite a while. You first started seeing them a few years back at state fairs and they have since caught on in popularity in the BBQ community.

Just like it's ice cream counterpart and inspiration, the BBQ Parfait is  simply a savory version of this layered dish. The ingredients can really run the gamut.

Layers usually include pulled or chopped pork, mashed potatoes, coleslaw, BBQ sauce and baked beans. I've seen them layered with cheese sauce, bacon, chopped brisket, pulled/chopped chicken or turkey, smoked sausage, stuffing and/or corn bread and topped of with anything from bacon bits, to cherry tomatoes and even pickles. The possibilities are really endless.

With the basic ingredients shown at the right, you can make two different types of parfaits.

Let's start with the parfait pictured above. The ingredients are: Hungry Jack Redskin and Yukon Gold Mashed Potato Mix, Leftover Pulled Pork, Heinz Homestyle Pork Gravy,  French's Brand French Fried Onions, Cherry Tomatoes and your favorite BBQ Sauce.

Prepare the Potatoes according to the directions on the box. Heat the pork gravy to a simmer in a sauce pan. And finally, reheat the pulled pork (I usually reheat in a microwave at 50% power until it starts to steam). Now it's time to layer! Start with a clear solo cup. Add a scoop of potatoes to the bottom of the cup. The next layer is pork gravy, just enough to top the potatoes. Now add a scoop of pulled pork and top with BBQ sauce. Then add another layer of potatoes topped with more pork gravy. This should take you almost top of the cup. Finish to just above the top of the cup with a layer of pulled pork drizzled with BBQ Sauce. Add a dollop of mashed potatoes. Sprinkle with fried onions, drizzle on some more BBQ sauce and top with a cherry tomato -  VoilĂ !!!

For the second version, the ingredients are: Bush's Bold and Spicy Baked Beans, Left Over Pulled Pork, your favorite BBQ Sauce, your favorite Coleslaw recipe and a Cherry Tomato.

Heat the baked beans to a simmer in a sauce pan and reheat the pulled pork using the microwave method previously described. Your first layer is baked beans. Top the baked beans with pulled pork. Then top with BBQ sauce and finish with a layer of coleslaw topped with a cherry tomato. This one is a little messier than the first version. I use a ratio of 1/3 beans, 1/3 pork topped with BBQ sauce and 1/3 coleslaw so that it ends up just below the top of the cup. 

There you have it ... a tasty and interesting way to spice up leftover pulled pork! As I mentioned before, there are endless possibilities and you don't have to limit yourself to just BBQ. Case and point, Thanksgiving leftovers. Rather than heating up a plate of leftovers, why not try a parfait with mashed potatoes, gravy, turkey and stuffing. The parfait is a great way to add a new twist to your leftovers. I encourage you give it a try and let me know about your creations. Enjoy!


Sunday, July 29, 2012

Smoking with a Weber Kettle

A lot of people have asked for advice on how to get competition quality BBQ results at home. In fact, as I was writing this post, my brother Mike stopped by to get my thoughts on what kind of smoker to buy. I shared with him what I am sharing with you today. If you have a Weber kettle grill, you already have what you need to make great tasting low and slow cooked BBQ right in your own backyard today. 

The main difference between a smoker and a charcoal grill is that a smoker keeps the fire away from the food. Cooking low and slow on a smoker produces juicy, tender, mouth-watering meats that taste incredible. The secret to cooking low and slow is using an indirect heat source and controlling your temperature. Setting up the Weber for 2-zone and/or indirect grilling allows you to do just that.

In a 2-zone set-up, the heat source is on one side of the grill (heat zone) and you cook on the other side (indirect or cooking zone).

To create the heat zone, build a pile of coals on the lower charcoal grate to one side of the grill.

The side opposite the coals will be the indirect or cooking zone. Place an aluminum drip pan on the lower grate opposite the coals as pictured on the left. I like to use an aluminum turkey roasting pan and bend it to the shape of the kettle.

This is the basic concept for creating a 2-zone set-up. There are a couple of options though for controlling temperature that will impact how you start your coals and how to bring the grill up to 225 degrees, the ideal temperature for low and slow smoking. We will cover those in bit.

Regardless of option you chose, you need a reliable way to measure the temperature inside the Weber. When I first started using the Weber for smoking, I drilled a hole in the lid and mounted an analog thermometer (see picture at right). The issue is that most of the analog thermometers designed for mounting on a grill or smoker are calibrated at the factory and there isn't a way to recalibrate them. Over time they lose accuracy. In fact, they can be as much as 50 degrees or more off. Since we are striving for a consistent cook at 225 degrees, I wouldn't recommend this option unless you truly know the actual temperature variance.

A more reliable option is to invest in digital smoker thermometer. Maverick industries makes a wireless digital smoker thermometer with a transmitter and a remote receiver. This unit allows you view the internal temperature of the smoker and the internal temperature of the food being cooked in the smoker from up to 100 feet away. Best of all, at around $30, these units are very affordable.

I use the Maverick ET-73 RediCheck Remote (pictured at left). I have found the internal smoker temperature probe to be very reliable. The meat temperature probe is fairly accurate, however, there are better quality instant read digital thermometers available in the market. It's really a matter of personal preference. This unit is more than sufficient for the backyard. Now that we have covered how measure temperature, it's time to take a look at some options on how to control it.

The first option is what I will call old school or low-tech and requires using the vents (dampers) to control the airflow and regulate temperature. The second option is more high-tech and involves using an electronic device to automatically control airflow and temperature. The benefits of having automatic temperature control are numerous, however, the greatest advantage is you can set it and forget about it. On the flipside, that comes at a cost. Each option uses a different method for starting the coals and getting the Weber up to temperature. Both, however, use the same 2-zone set-up described previously. Let's take a look at both methods.

Old School (low-tech)

With this method, the dampers on the bottom (intake) of the Weber and on the lid (exhaust) are used to control the internal temperature. Set the exhaust damper on the lid about 1/8 inch open. This is sufficient enough to allow heat and smoke to escape as well as draw air from the intake damper on the bottom of the Weber. The intake is how we will control the internal temperature. The best way to start is to open the intake damper about 3/8 inch or the width of a pencil. Closing the damper will reduce the temperature, opening the damper will increase it. Now that we have a way to measure and control temperature, let's cover how to start the coals and bring the smoker up to 225 degrees for some low and slow cooking.

With the old school temperature control option, we will use a a standard charcoal chimney to start the fire. Fill a charcoal chimney to the top with coals. Dump half of the coals onto the lower charcoal grate in the heat zone and spread them evenly along the bottom. Now start a fire and light the remaining coals still in the charcoal chimney. When the coals are fully lit, dump them on top of the unlit coals in the heat zone, spread them out evenly and close the lid. Now it's just a matter of reading the digital thermometer (or analog) and adjusting the intake damper to bring the smoker up to temperature. As soon as you get to temp, add your preferred smoking wood, throw on the meat and start cooking low and slow. By the way, you will need to regularly monitor the temperature and adjust the damper as necessary to keep a consistent temperature. Now let's look a the high-tech option for controlling temperature.

New School (high-tech)

With the high-tech option, you will use an electronic device to both monitor internal temperature and to control the air intake. The device I use is the iQue 110 Automatic Temperature Controller manufactured by PitmasterIQ here in the St. Louis area (pictured at right). They retail for $139.95 which is a on the very low-end for these kinds of devices. For example, the BBQ Guru DigiQ DX for the Weber will run you between $300 - $350 and you have to drill a 1 inch hole in the side to mount the manifold. The iQue 110 installs in about 1 minute with no invasive modification to the Weber.

With the old school method, there is a lot of trial and error involved in getting the Weber up to temp and keeping it regulated. It is pretty much a constant process of reading the temperature and adjusting the intake damper to correct the temperature. Don't get me wrong, you end up with great product but you spend a lot of time making adjustments to get that end result.

With the iQue 110, you start a fire, connect the temperature probe to the cooking grate, connect the blower manifold to the intake damper, dial in the desired temperature (225 degrees) and when the green light comes on you are ready to cook. No need to constantly monitor temperature and adjust the air intake dampers. Now it's all automatic, you set it and forget about it.

Starting the fire is also a much simpler process with the iQue 110. To start the fire, build a pile of approximately 40-50 charcoal bricks on the heat zone side of the charcoal grate. Place a Weber Firestarter Cube underneath a couple pieces of charcoal on the extreme right or left side of charcoal pile and light it (see picture on left). The Firestarter cube is readily available at most Lowes or Home Depot stores (or online from LSATSB). They are odorless and smokeless and burn hot until completely gone (about 12 minutes).

Once the Firestarter cube has burned out, place the lid on the Weber and set the dial on the iQue 110 to 225 degrees. Now it's time to sit back and let the iQue 110 do it's thing.

When I cook pulled pork at home, I set up my Weber exactly as I just described. I start the fire at about 11:30pm and by midnight, the Weber is usually up to temp. I add a couple of fist size chunks of smoking wood or a large Mojobrick (will write a post on these soon), throw on an  8 - 10 lb Boston Butt and then go to bed. Sometime between 8am and 9am the next morning, I will check the temp of the meat. By this time, it should be ready for foil and final 1 or 2 hours on the smoker. When the meat is done, I rest it for a couple of hours and by noon were ready to pull some pork!

With either of these set-up options, low-tech or high-tech, you can cook competition quality BBQ at home on a Weber kettle. Each has their pro's and con's.

The old school method is easier on the pocket book, but requires far more attention (as does any smoker for that matter that does not have an electronic temperature and airflow control). The iQue 110 really gives you peace of mind. There's no need to get up in the middle of the night and check the temperature or fiddle with the damper. In fact, I have cooked as long as 16 hours on the Weber with the iQue 110 with just 40-50 bricks of charcoal and a couple chunks of wood. The downside is obviously the cost.

Hopefully this post has been helpful! If you are looking to take the plunge, keep checking back for more advice, tips and techniques on how to get competition quality BBQ results at home.

Wednesday, July 25, 2012

Our Journey into Competition BBQ


Back in 2009, when Bren NuDelman said we ought to enter the BBQ Bash, I thought why not – it’ll be fun.  After all, we both love BBQ and it’s close to home (Wildwood) so we can invite our friends. Bren will cook some ribs, I’ll make some pulled pork and chili and it will be just like a backyard BBQ. The thought of getting into Competition BBQ never crossed our minds. We had no idea at the time that this would be the beginning of a journey.

Bren cooking on the Original Two Barrel Smoker
As we started our preparations for the Wildwood Bash, the reality of it all started to sink in.  There were assigned spaces, move-in times, food inspections, sanitation requirements, meat and garnish requirements, and specific turn-in times. It was more like a backyard BBQ on steroids.  We made a list of everything we needed and started stockpiling. And oh yeah, we still needed to come up with a team name! So what would we call ourselves? As it turned out, our preparation was our inspiration for our team name. We had a smoker our friend Jeff Busby constructed out of two 55 gallon barrels (see right) and we had a stockpile of stuff we had accumulated for the competition.  Put it all together and you get “Lock, Stock and Two Smokin’ Barrels”. And so our journey begins!

We had really no idea what to expect at the Bash. I think we started out the competition looking like deer in headlights and ended up running around like chickens with our heads cut off.  Despite all the madness, we got the opportunity to meet some Professional Competitive teams who were gracious enough to answer our questions and give us advice. They made us feel like members of the Competition BBQ fraternity. We listened and learned and when the dust finally settled, we were absolutely shocked! We had only entered half of the food categories and ended up with two top 10 finishes (pork and chili). So now were hooked and we immediately start making plans for the 2010 Bash.

In 2010, we are going to cook every category. We will have all summer to practice. It will be great! We will do even better! Leading up to the Bash, were cooking every weekend and our confidence is growing. We are better organized, we have our timings down and everything tastes great. We are going to win the whole thing! When the competition starts, it’s not nearly as frantic as last year. Sure, were still drinking from a fire hose, but were not spilling a drop!  Whew! Were finished! We head over to the awards ceremony with visions trophies dancing round our heads. We’re pumped! The first category is Chef’s choice. They start calling the top 10. In 7th place: Lock, Stock and Two Smokin’ Barrels. Wow! Bren is called to the stage in the very first category! We are so going to win this thing! We move on to the next category. They start calling the top 10. They get to number 2 and we still haven’t been called. The anticipation is building. Could we have won! And the winner is … Oh no! It’s not us! No worries, it’s just one category, we have 6 more opportunities!  And as each category is called, we wait and wait and wait and never hear our name called again. What could have happened? We don’t get it. We turned in great food! The judges must be Smokin’ something too.

The simple fact is that this was only our second competition and we still had no idea what we were doing. But at least we had the right attitude! Despite the outcome, we competed in all 8 categories, finished 34th out of 91 teams and got a call to the stage. We looked at that as something we could definitely build upon. We just had to figure out what we should have done differently, so we embarked upon a quest for knowledge.  All aboard!

First stop, SLBS certified judges training. Richard and Susan Schmidt are extremely knowledgeable and experienced judges. They shared valuable information on what judges are expecting and how they score for appearance, taste and tenderness. Armed with that knowledge, our next stop was the Internet. We joined forums and discussion groups focused on competitive BBQ in order to learn cooking and presentation techniques; everything from how to build a turn-in box to how to achieve bite through skin on chicken.  And finally, the last stop, and perhaps the most fun, was in the application of what we learned. We made the decision in 2011 to enter some smaller contests to gain more experience heading into the Bash. Our end goal and what we had our sites on was to better our 2010 performance at the Bash. What we didn’t realize at the time is that is when truly started to become a Competitive BBQ team.

2011 Wildwood BBQ Bash
2011 Great Pacific BBQ
Eyes on the Bash, we entered two events to sharpen our skills. Our first event was Harrah’s High Steaks in June of 2011. This was a one-day event and it gave us the opportunity to practice pork steaks, chicken, ribs and chef’s choice. We ended up with a 2nd Place in pork steaks, 5th Place in Chef’s choice and 7th overall.  Our second event was the Great Pacific BBQ. We finished top 10 in ribs and pork and 13th overall. What we didn’t realize at the time was that 7 of the top 20 teams in the KCBS point standings were also competing at Pacific. So we felt pretty good coming in 13th out of 42 given the competition. With these two events under our belt, we gained valuable knowledge and experience on what we needed change heading into the bash.  So how did we do? If expectations influenced outcomes, we would have won the overall championship. Although we didn’t win, we achieved our overall goal of improving upon our 2010 results. We finished 6th place overall with 3 top 5’s (4th in pork, 5th in brisket and 5th in dessert).

Enter 2012, Two and half years of trial and error and 6 competitions later, we are all in. We decide we will enter 8 to 10 events culminating with the BBQ Bash in September.  We are now a competitive BBQ team! And so the journey begins!

Welcome to our Blog!

I am Bill Grenko and along with teammates Anne Grenko, Bren Nudelman, Kathleen Nudelman, Jeff Busbee and Penny Tenbruggencate compete on the SLBS and KCBS Circuits as Lock, Stock and Two Smokin' Barrels BBQ Team.

For us, the journey so far from Backyard BBQ to Competition BBQ has been fun and incredibly rewarding. We've met great cooks, made many new friends and gained a wealth of information from the Competition BBQ community. It has taken years of trial and error, seeking advice and practice to develop the recipes and techniques to not only start taking home trophies, but to enable us to win multiple Grand Championships. We are passionate about BBQ and are constantly striving to refine and perfect our recipes in order to gain a competitive edge.

We started this blog to share our passion for BBQ with other enthusiasts. If you have never tried competition quality BBQ, you are in for a real treat. Our goal for this site is to share the recipes, products, tips and techniques that we are learning along the way so you too can cook and enjoy competition quality BBQ!